By Ed | Starrs Aboard
Well, apparently my wife has decided it’s my turn to write a blog post. Now, I barely know what a blog is, much less how to write one. But Laura told me not to worry about it. “Just describe what you did yesterday,” she said.
Sounds simple enough, I guess.
So here goes…
As we’re getting our Country Coach ready for full-time RV living, I’ve been working on some of the little things that could turn into bigger problems down the road.
One of those things is keeping mice out of the motorhome.
We haven’t had a mouse problem, and I’d like to keep it that way. More importantly, I know my wife well enough to know that she would NOT be happy if we picked up a few additional “pets” along the way.
Charlie and Barkley are enough. We don’t need Mickey and Minnie joining us.
An Open Invitation
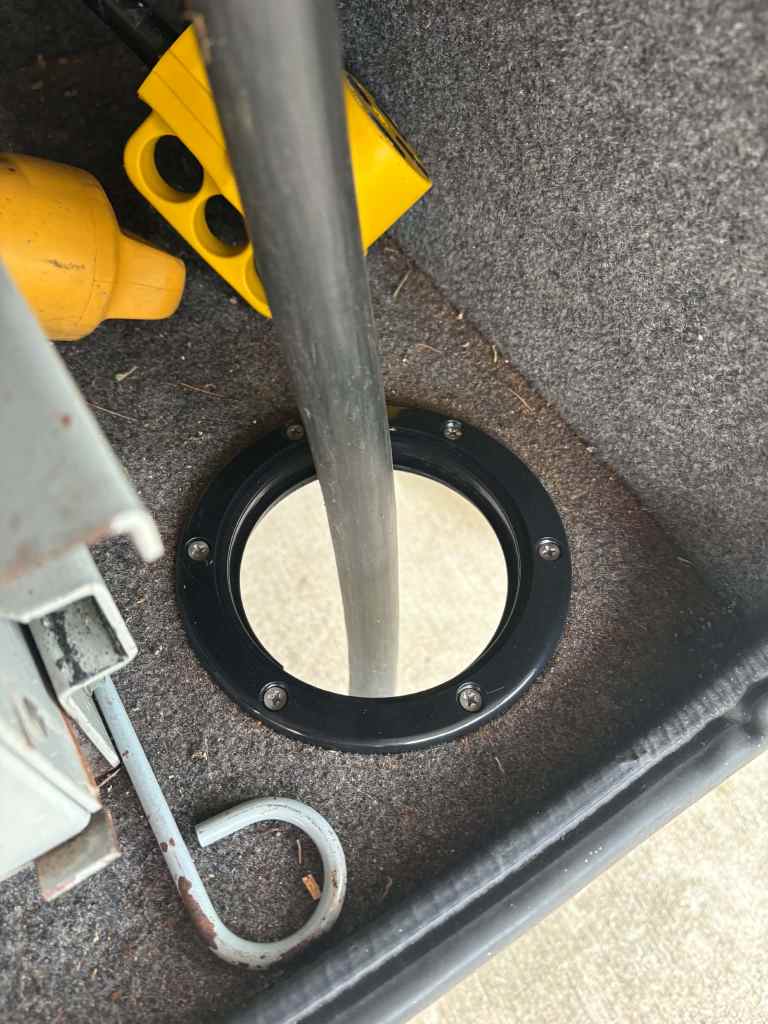
Like most motorhomes, our Country Coach has access holes in the bottom of the utility compartments where the electrical power cord, water hoses, and TV cable pass through.
These openings are approximately four inches in diameter, but the cords and hoses going through them are only about an inch thick.
That’s a pretty good-sized gap, especially when you consider that a mouse can squeeze through an opening about the size of a dime.
I figured it would be a lot easier to close up those openings now than deal with unwanted visitors later.
A Little Ingenuity and an Old Mud Flap
I like to use materials I already have lying around whenever possible. Over the years, I’ve accumulated a pretty good collection of odds and ends, and sometimes they come in handy.
This time, I found a piece of an old rubber mud flap that was approximately 1/4 inch thick.
It was flexible, sturdy, and just about perfect for what I had in mind.
My plan was to make a removable rubber insert that would fit into the four-inch access hole while sealing around the cord or hose passing through it.
And the best part? I wouldn’t have to disconnect anything to install it.
Here’s How I Made It
This is a pretty simple project that most RV owners could do with a few basic tools.
What I used:
- A piece of 1/4-inch-thick rubber mud flap
- A 4-inch hole saw
- A smaller hole saw sized to match the cord or hose
- A utility knife
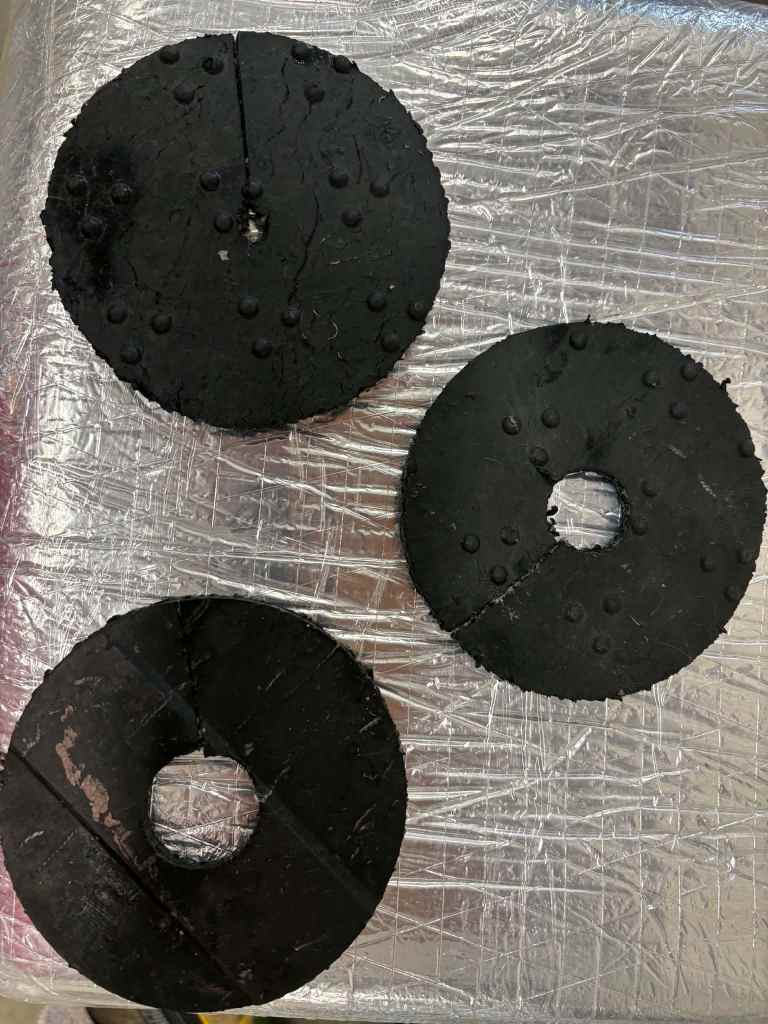
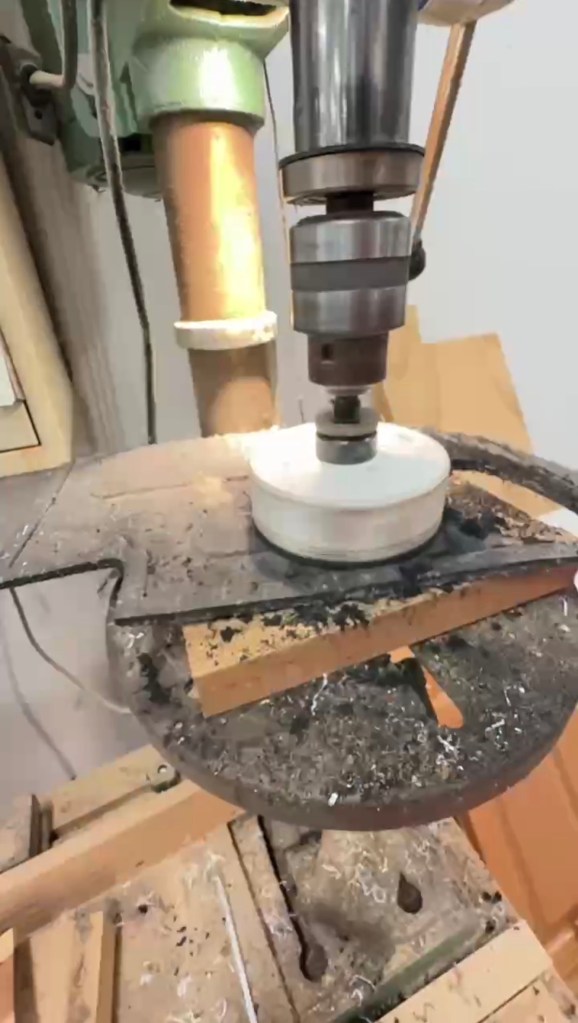
Step 1: Cut the rubber disc.
Using the four-inch hole saw, I cut a round piece out of the rubber mud flap. This would become the insert for the existing access opening.
You’ll want to check the actual diameter of your opening and the disc your hole saw produces. The insert needs to fit snugly enough to stay in place.
Step 2: Cut the center hole.
Next, I used a smaller hole saw to make an opening in the center of the rubber disc.
I sized this hole to fit around the cord or hose that would pass through it, without squeezing or damaging it.
Step 3: Make a slit.
I used a utility knife to cut a straight slit from the outside edge of the rubber disc to the center hole.
This is what makes the whole thing work. Instead of having to thread the cord through the rubber, I can simply open the slit and slide the insert around the cord that’s already in place.
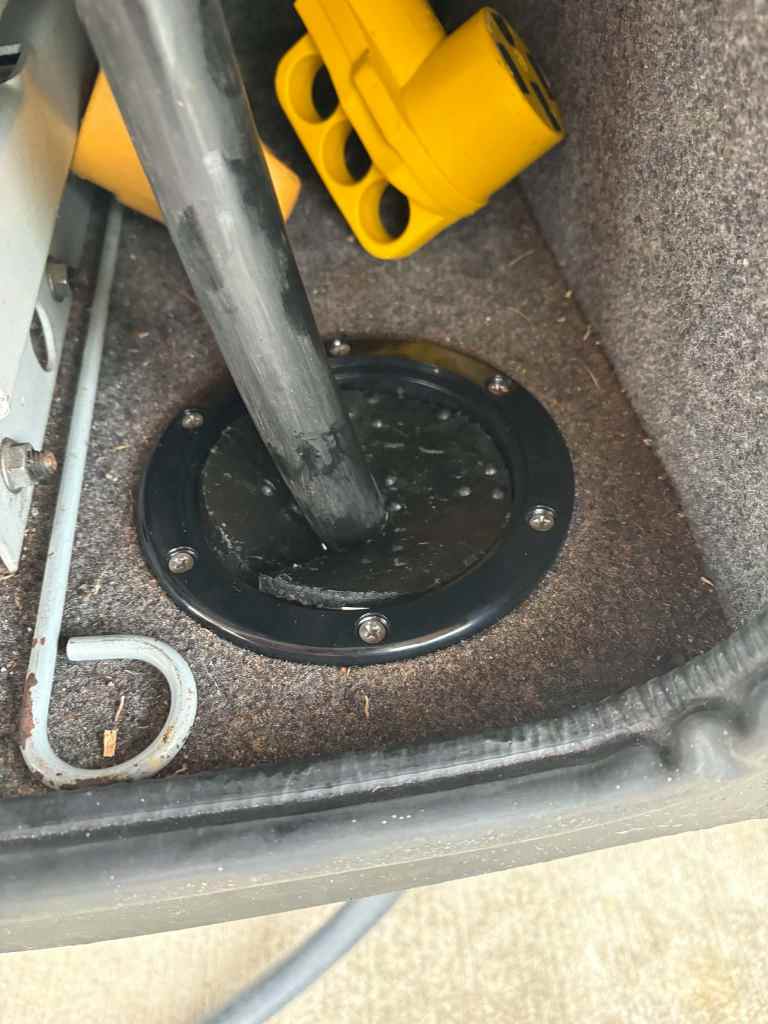
Step 4: Install the insert.
Once the rubber was around the cord, I pushed it into the four-inch access opening.
As the rubber flexed into place, the edges of the slit overlapped slightly, helping close up the remaining gap.
That’s it!
The rubber fits around the cord, covers the oversized opening, and can be removed when needed.
No glue, no permanent modifications, and no need to disconnect the utilities.
Just be sure the rubber doesn’t pinch or damage electrical cords, and don’t cover any openings intended for ventilation, drainage, or exhaust.
Thirty Minutes and Zero Dollars
The whole project took me about half an hour.
And since I already had the mud flap and tools, it didn’t cost me anything.
You can buy products designed to help seal RV utility openings, but I enjoy figuring out how to make things myself, especially when I already have the materials.
Besides, I’ve been saving that old mud flap for something. I just didn’t know what.
Will It Keep the Mice Out?
Time will tell.
Mice are resourceful little creatures, and sealing these openings doesn’t make our motorhome completely mouse-proof. But it does eliminate some obvious entry points.
I also like that the rubber is flexible and removable. If I need to change a hose or cord, I can take the insert out and put it back when I’m finished.
And so far, we haven’t had any mice.
Of course, we didn’t have any before I started, either. But that’s kind of the point!
Mouse-Free Life, Happy Wife.
When Laura asked me why I decided to do this project, my first answer was, “Something to do.”
Which was true.
But the real reason?
Because I know my wife would NOT be happy if she discovered we had a few extra pets living in the coach.
And I have a pretty good idea who would be responsible for catching them.
I’d much rather spend thirty minutes with a hole saw and an old mud flap than spend an evening chasing a mouse around a 36-foot motorhome.
As we get closer to living in the Country Coach full-time, I’m finding plenty of little projects like this one. They may not be exciting upgrades, but they’re the kinds of things that can make life on the road a little easier.
Sometimes the best improvements aren’t the ones you notice.
They’re the problems you never have.
And if this little project keeps even one mouse from moving in, I’ll call it a success.
Ed
Starrs Aboard


Leave a Reply